


New TopRC T-28 Trojan
 01-05-2024, 03:40 PM
#201
How did you get the oleo apart?
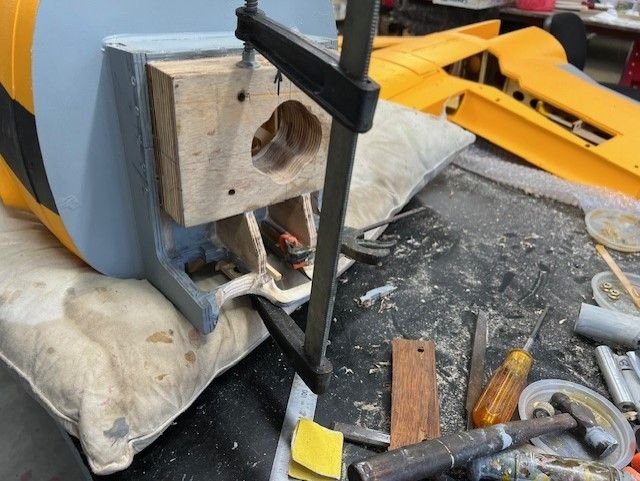
54mm lamination is done and epoxied to the firewall, firewall was sanded back to bare timber first.
I want to pin the lamination from the sides though not sure what to use for that yet. Used disc sander on my Ryobi gadget to get the sides of the lamination trimmed for a snug fit.
Wanted to also use the belt sander part to knock it back fast however the drive belt broke. Only recently replaced that too. Ordered more from fleabay.
The timber used in the nose leg area is rubbish, laminations of cheap and nasty 1/8th ply glued with some sort of poor quality glue.
Once I get the gussets in place and some carbon fibre it will be ok.
 01-06-2024, 12:47 AM
#202
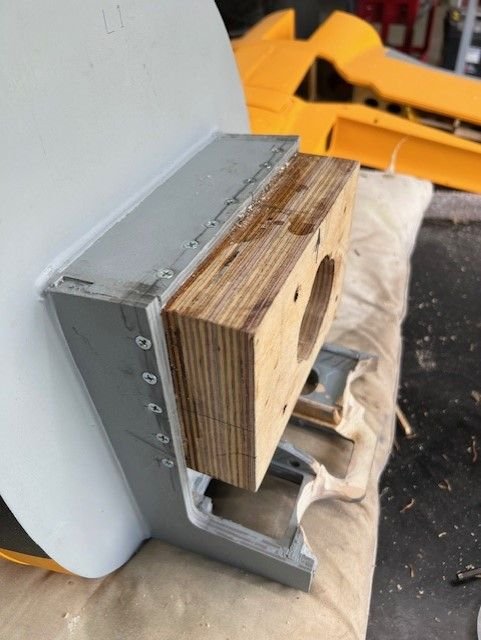
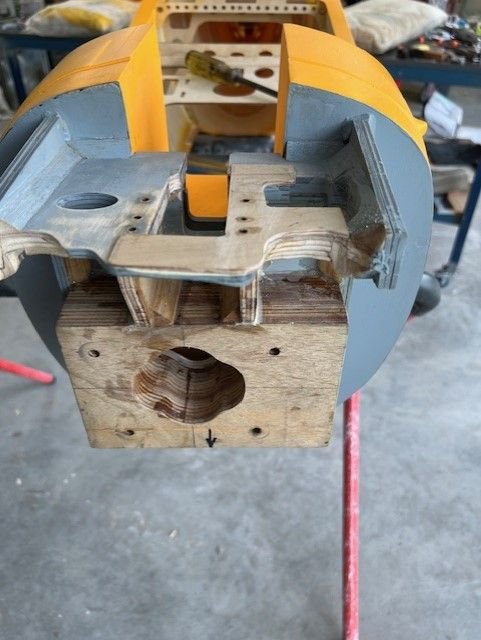
More work on the engine mount and doing some braces. 9mm marine ply used for the braces.
Decided I did not need the outer braces.
Still to epoxy some tristock in a few areas.
Once that is done I will refit the engine and check where the nose gear needs to go, I'll mark that up then I can get on with a bit of reinforcement to the front lip area and wrap it as far back each side as I can.
From there some carbon fibre will be applied in a few areas.
Quite happy so far despite the crap materials they use. For the money better quality is expected.
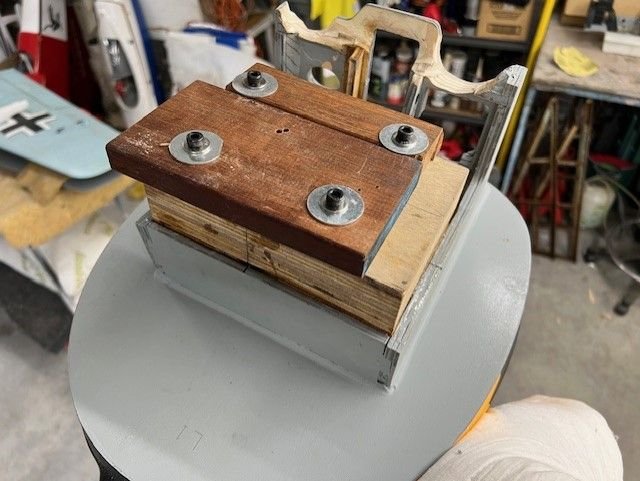
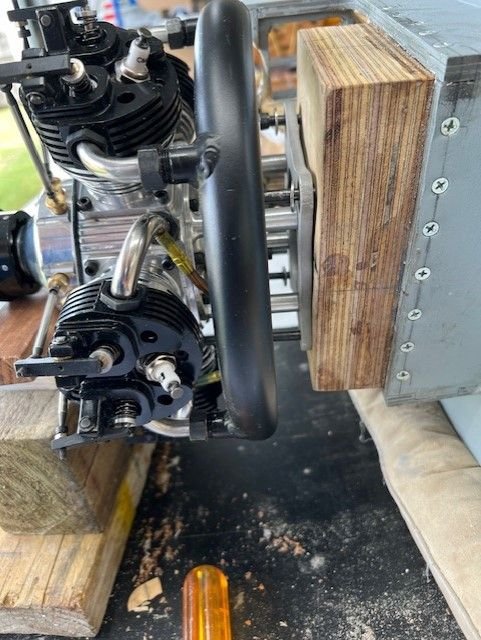
Have screwed the outer box to the lamination using 1" x # 6 counter sunk screws.
9mm marine ply braces, they will be glued in place with hysol slow cure.

Braces are now glued in place with Hysol high strength slow cure.
Decided I did not need the outer braces.
Still to epoxy some tristock in a few areas.
Once that is done I will refit the engine and check where the nose gear needs to go, I'll mark that up then I can get on with a bit of reinforcement to the front lip area and wrap it as far back each side as I can.
From there some carbon fibre will be applied in a few areas.
Quite happy so far despite the crap materials they use. For the money better quality is expected.
Have screwed the outer box to the lamination using 1" x # 6 counter sunk screws.
9mm marine ply braces, they will be glued in place with hysol slow cure.
Braces are now glued in place with Hysol high strength slow cure.
01-06-2024, 10:07 PM
#203
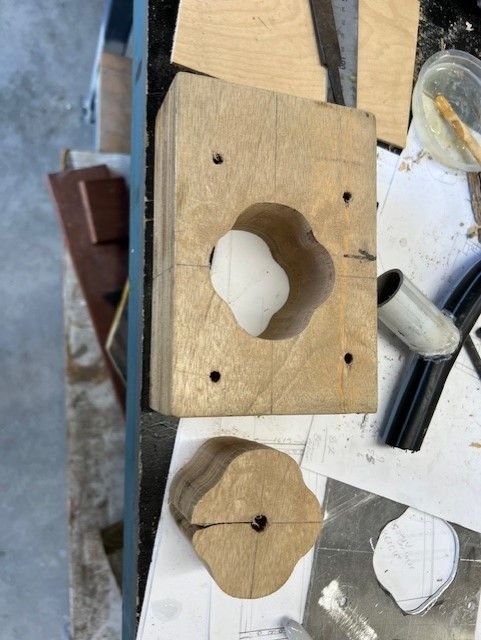
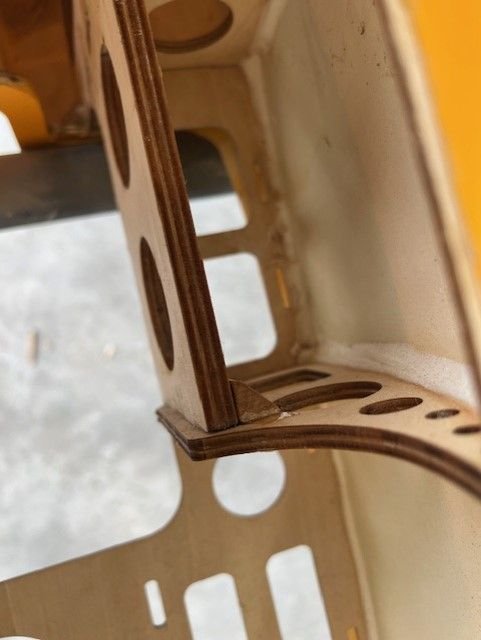
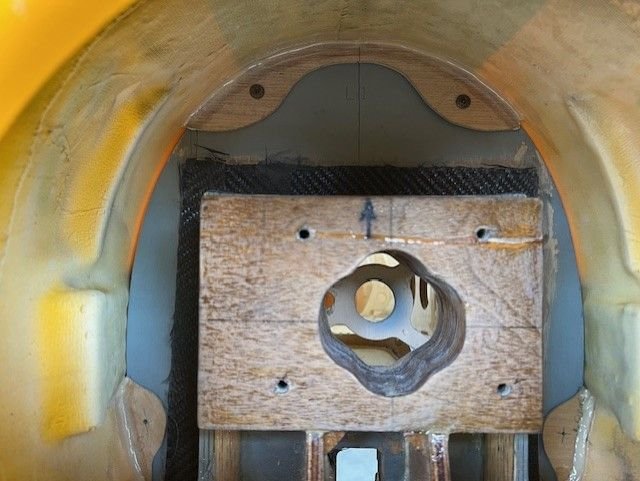
Gussets done including tristock. One thing I did stuff up was that the left had gusset look at the front had a bit of slop when I cut it and thought I'd just fill the gap with hysol but then I clamped it all which compressed said gap and has put a twist to the gear rail with that one being lower than the right. Totally forget about the gap when I clamped it.
I'll do a shim out of 1/8th play and sand to fit so not a real issue. I intend to do a 1/8th ply double around the lip anyway.
I inserted a block with hysol where the original gap had been, see photo and once I start to get nose leg mounted I will mark where I actually need the slot for the retract servo bracket to be.
I'll also need to drill another hole in each side of the retract itself as the front hole will not have enough "meat" of the timber to screw into.
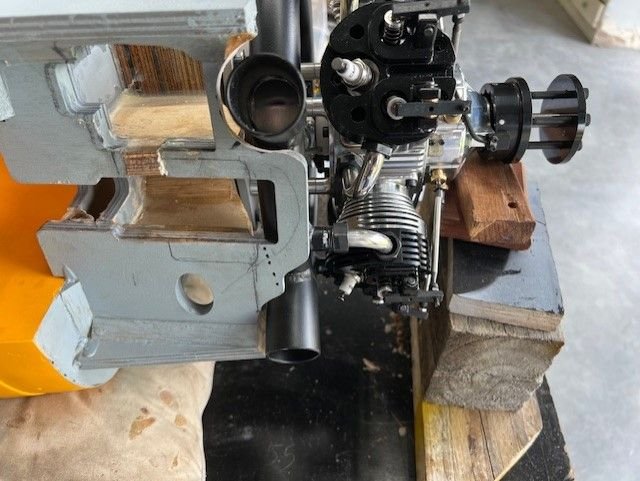
I possibly could have brought the engine back a few mm by surface shaving the laminated block but that invites clearance issues with the nose wheel as I have only about 8mm of play at the rear of well.
I also like the fact I have about 2.5mm around the exhaust outlets to allow some air to circulate.

I'll do a shim out of 1/8th play and sand to fit so not a real issue. I intend to do a 1/8th ply double around the lip anyway.
I inserted a block with hysol where the original gap had been, see photo and once I start to get nose leg mounted I will mark where I actually need the slot for the retract servo bracket to be.
I'll also need to drill another hole in each side of the retract itself as the front hole will not have enough "meat" of the timber to screw into.
I possibly could have brought the engine back a few mm by surface shaving the laminated block but that invites clearance issues with the nose wheel as I have only about 8mm of play at the rear of well.
I also like the fact I have about 2.5mm around the exhaust outlets to allow some air to circulate.
Last edited by planenutzz; 01-06-2024 at 10:10 PM.
01-07-2024, 01:32 AM
#204
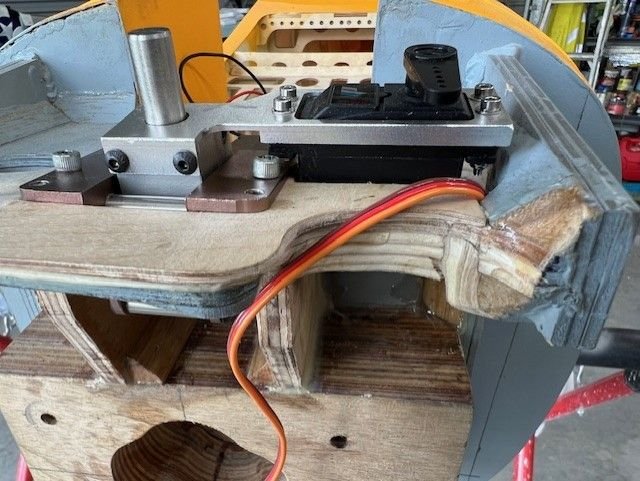
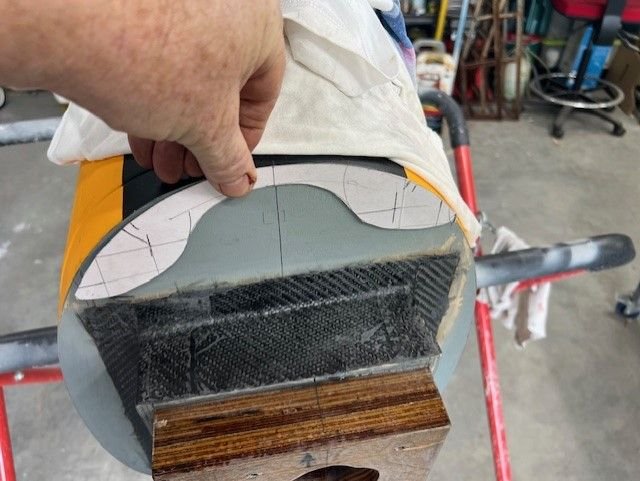
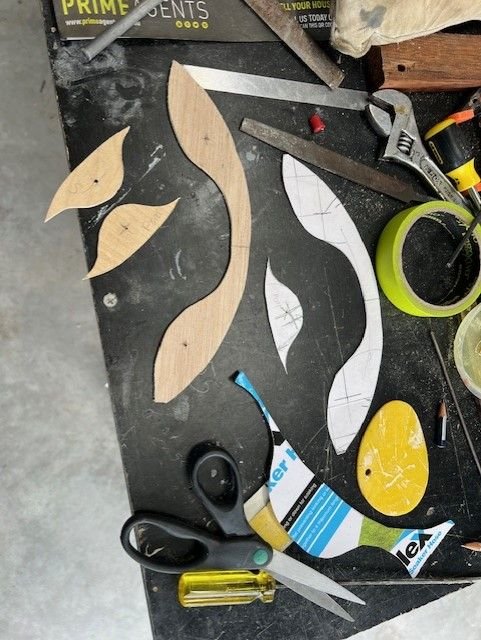
Have made up the 1/8th ply doubler which will also have a doubler under it on the low side, this will be gradually sanded down to create a taper. Once I am happy with the fit it will be hysoled on to the mount area.
Had to do a trial fit of the nose retract to check placement etc.
Had to do a trial fit of the nose retract to check placement etc.
01-07-2024, 11:36 PM
#205
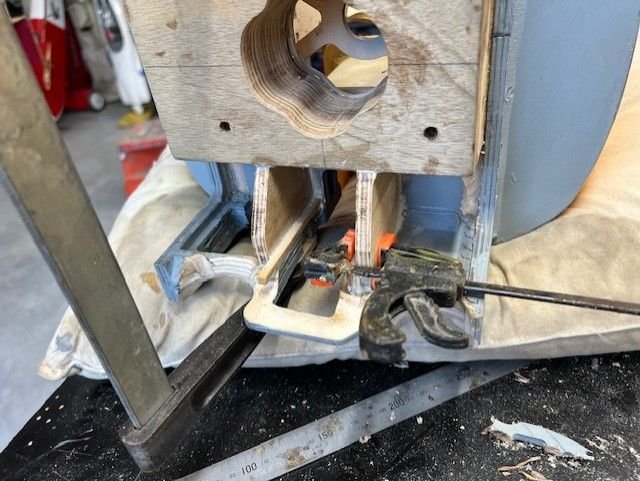
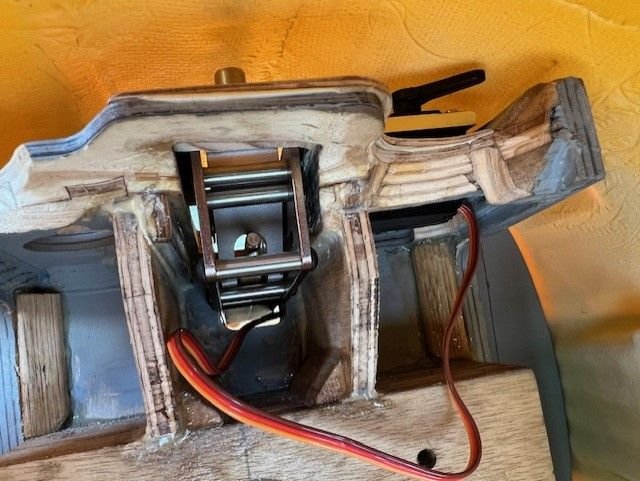
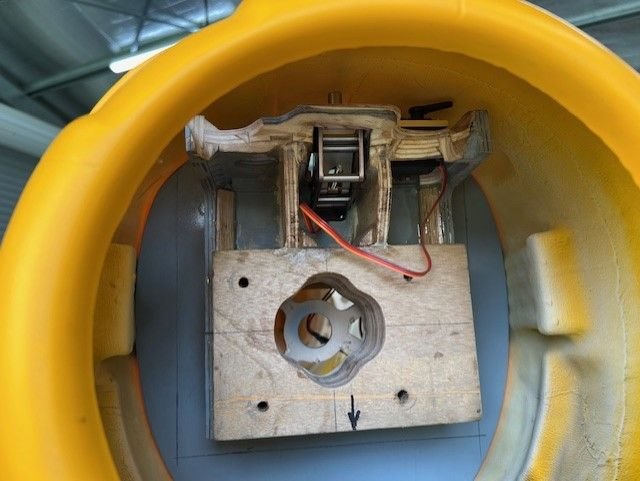
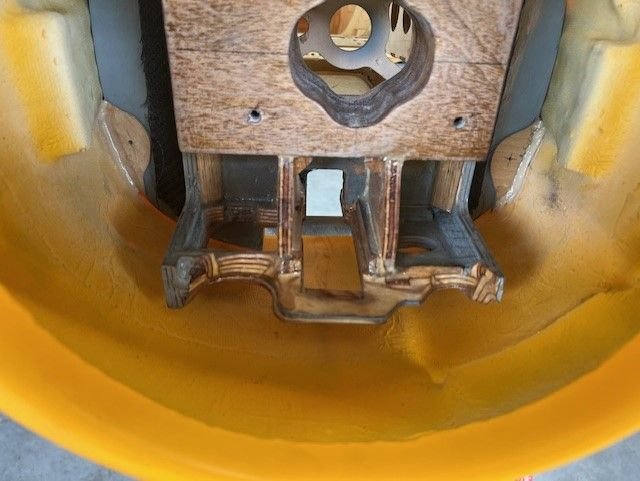
A day of fiddling about. Nose mount tapered ply piece done, ended up not needing to have it on the left side.
Glued on with hysol and nose retract unit mounted.
Lots of reinforcing with tri stock in some critical areas within the fuz.
Photos show the story.
This area was quite flimsy so got tri stock fore and aft epoxied on.
Tri stock n each side as shown
and here both sides L & R

The nose debacle sorted. Looks ugly but is now fit for purpose.

Next will trim timber to accept the steering servo.
Glued on with hysol and nose retract unit mounted.
Lots of reinforcing with tri stock in some critical areas within the fuz.
Photos show the story.
This area was quite flimsy so got tri stock fore and aft epoxied on.
Tri stock n each side as shown
and here both sides L & R
The nose debacle sorted. Looks ugly but is now fit for purpose.
Next will trim timber to accept the steering servo.
01-09-2024, 10:21 PM
#208
I managed to get front oleo apart, not sure what the "grease" is but it is not grease, it is clear and almost like half cured silicon sealant.
I cleaned it out, light lube with blue grease.
The main issue is the spring, virtually nil compression and only about 1mm if that gap between coils.
Surely they can fit a decent spring that is fit for purpose.
Will have to see what I can source to address that problem, oh and a new seal as I could not get it to reseat.
01-12-2024, 11:51 PM
#209
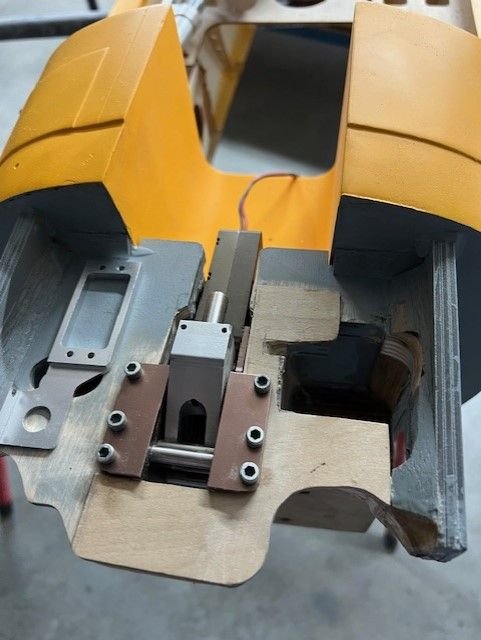
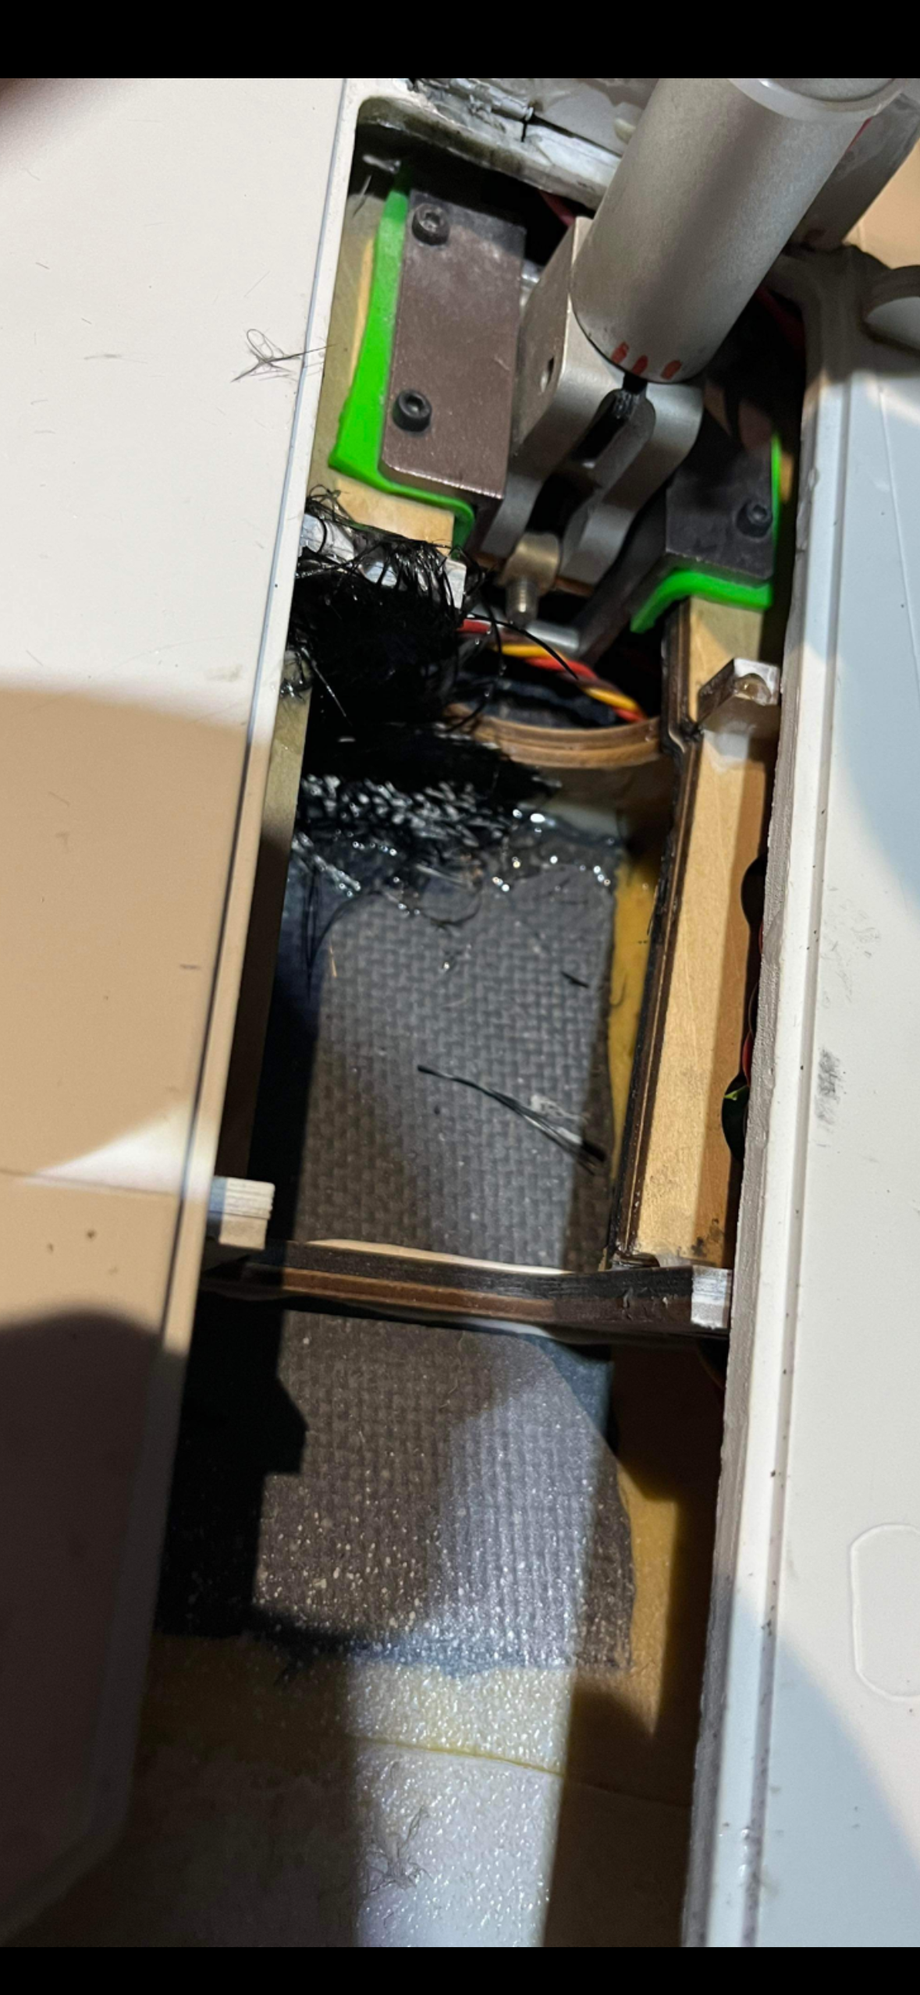
Bit more done, fettling for the nose steering servo done and it fits quite well. Had to swap one of the mounting screws for a cap dome head type then file that down a little.
Servo arm has been shortened a bit so that it does not get in the way of the exhaust tube. I'll be using an aluminium arm and Sullivan 4-40 Gold Clevis with the clips on each end.
I may need a heat deflector, we will see. I will definitely have one on top of the engine box to shield the ignition module.
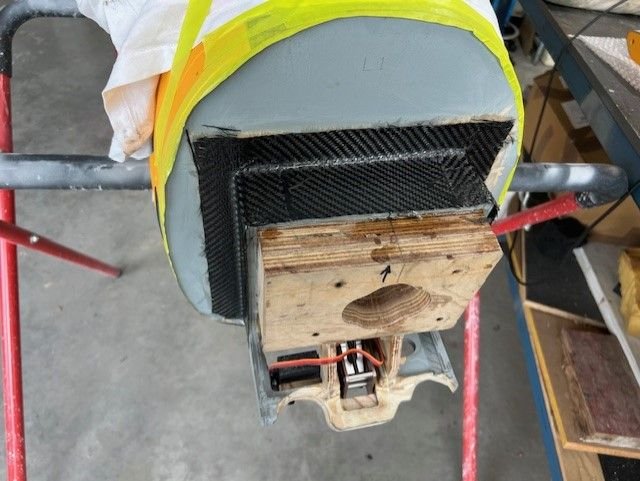
Carbon fibre has been glued on using LY3600 laminating resin.
Not a bad day's work.
After the CF had been done.
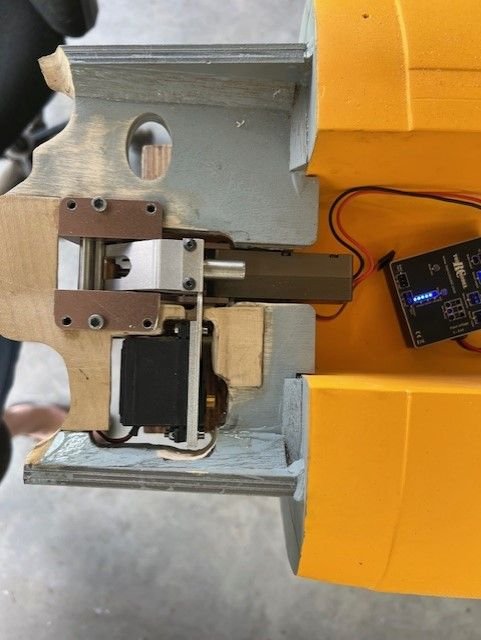

Plenty of clearance within the cowl.
Has about 5mm clearance.
Start of the carbon fibre application.

Carbon fibre bandage applied with LY3600 resin and exposed timber parts had a coat of thinned resin brushed on.
Servo arm has been shortened a bit so that it does not get in the way of the exhaust tube. I'll be using an aluminium arm and Sullivan 4-40 Gold Clevis with the clips on each end.
I may need a heat deflector, we will see. I will definitely have one on top of the engine box to shield the ignition module.
Carbon fibre has been glued on using LY3600 laminating resin.
Not a bad day's work.
After the CF had been done.
Plenty of clearance within the cowl.
Has about 5mm clearance.
Start of the carbon fibre application.
Carbon fibre bandage applied with LY3600 resin and exposed timber parts had a coat of thinned resin brushed on.
01-14-2024, 01:55 PM
#211
Nose gear doors pose a challenge. Full size uses offset hinging though getting access inside that gear well is not possible. I will use dubro pinned hinges of the type that the pins can be easily removed. that way the front part of the doors can have a hinge as well and I can seperate for removing the wing centre section if need be. I intend to leave centre section attached.
There is a smaller door on starboard side as well that I need to consider. Not sure about that as I may omit it to provide addtional cooling exit area.
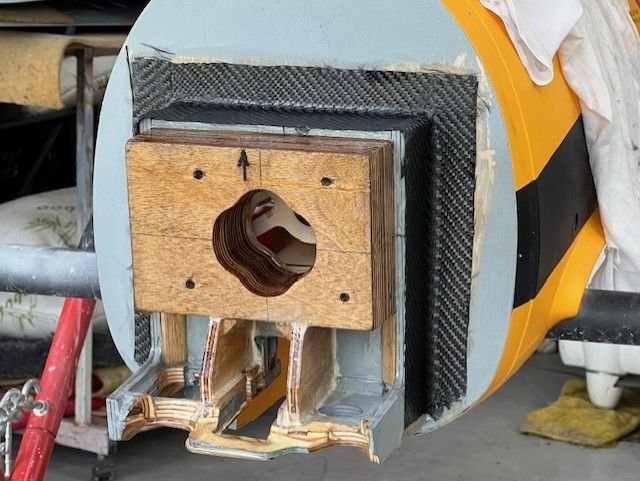
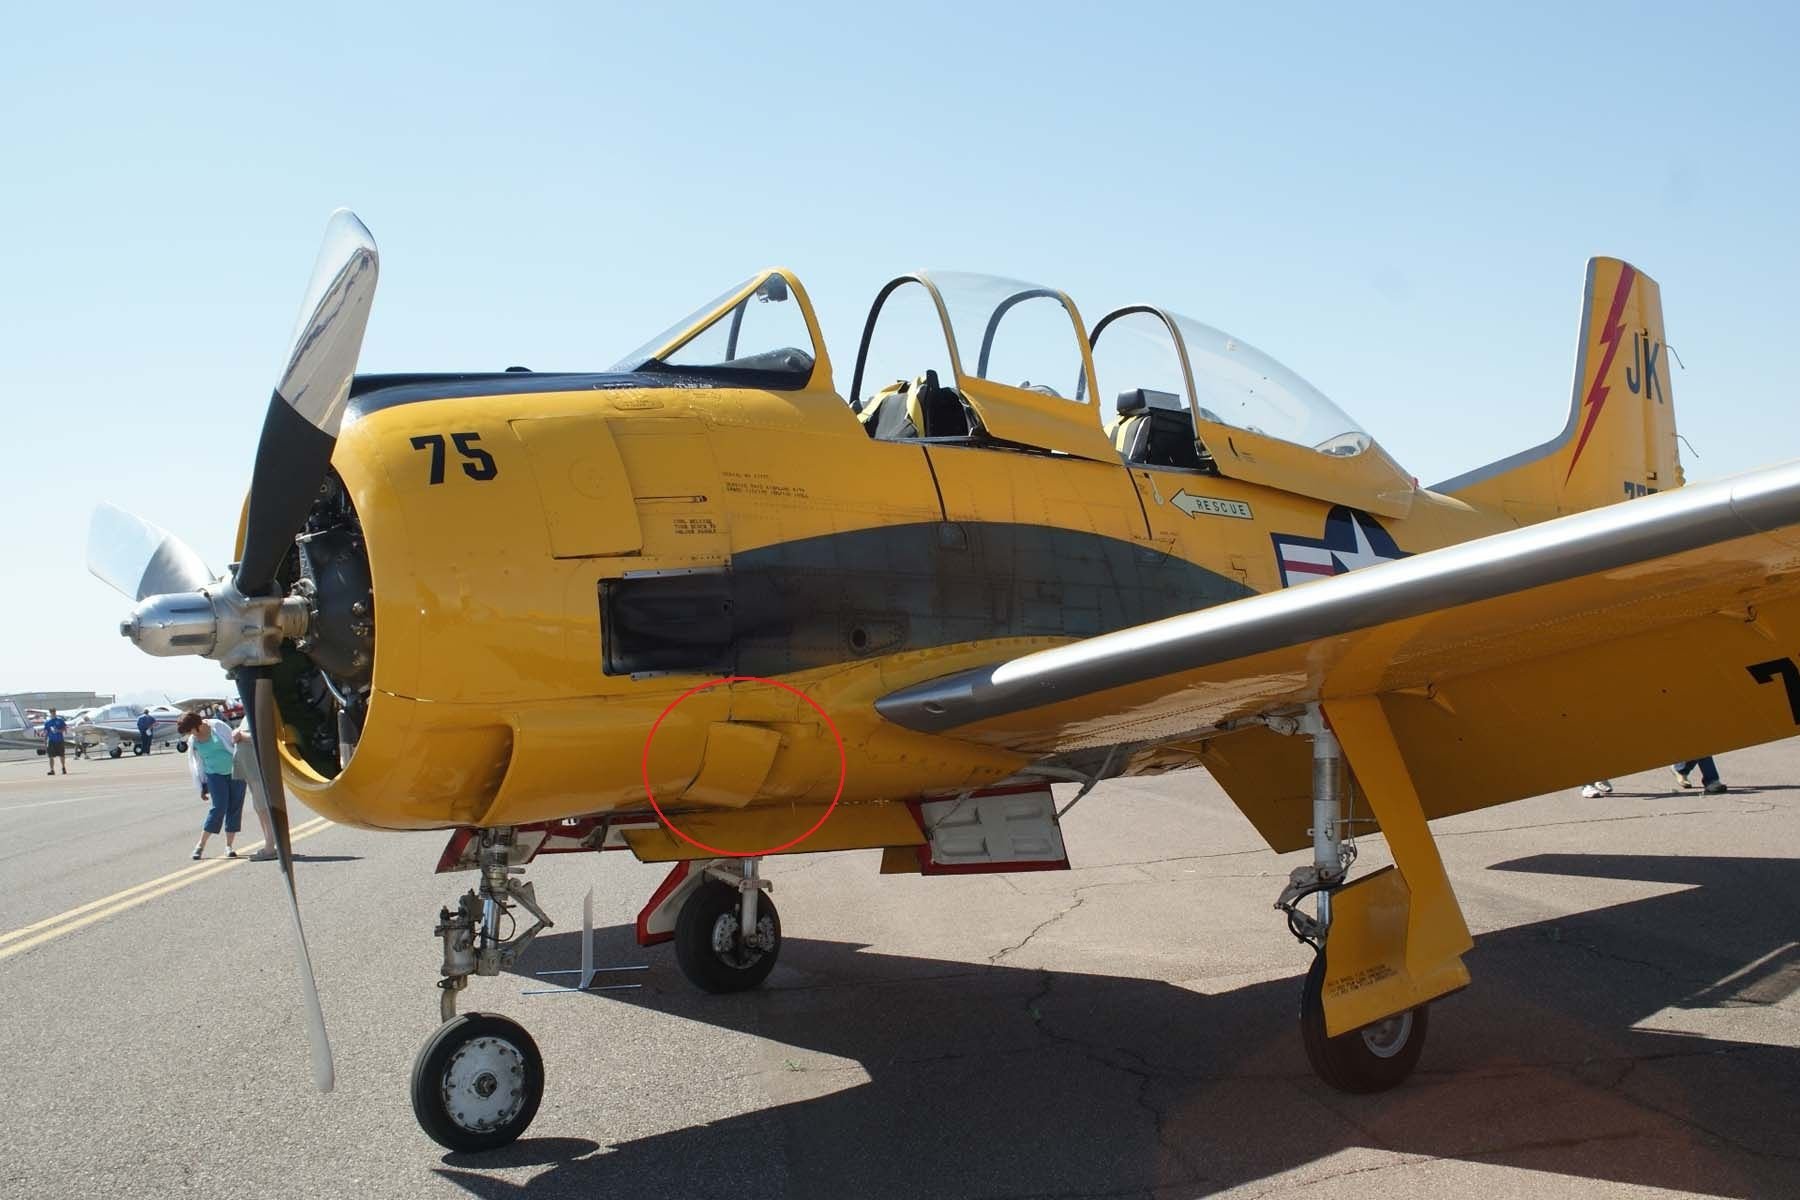
Some mods I am considering for mine to aid cooling.
- Open up scale exhaust outlet each side as much as possible up to the horizontal corrugations.
- Enlarge cooling vent flap opening each side but cutting each side, shave a bit of resin off inside so it can be opened easily then epoxy triangular sections each side - see top red circle in 1st photo. You can see just how far open these go, far more than what is molded into the cowl.
- There is another cooling vent opening on port side however it would extend past the main firewall. I am considering doing a version of this though probably not extend it as deep towards the rear.
Cut slots in firewall to create a recessed outlet with triangular sides. Said sides will be infilled with plywood and the outlet flap opened up. See bottom red circles for the area in question.
Inlet area as shown by yellow circle would be blocked off.
See photos below:

There is a smaller door on starboard side as well that I need to consider. Not sure about that as I may omit it to provide addtional cooling exit area.
Some mods I am considering for mine to aid cooling.
- Open up scale exhaust outlet each side as much as possible up to the horizontal corrugations.
- Enlarge cooling vent flap opening each side but cutting each side, shave a bit of resin off inside so it can be opened easily then epoxy triangular sections each side - see top red circle in 1st photo. You can see just how far open these go, far more than what is molded into the cowl.
- There is another cooling vent opening on port side however it would extend past the main firewall. I am considering doing a version of this though probably not extend it as deep towards the rear.
Cut slots in firewall to create a recessed outlet with triangular sides. Said sides will be infilled with plywood and the outlet flap opened up. See bottom red circles for the area in question.
Inlet area as shown by yellow circle would be blocked off.
See photos below:

 01-19-2024, 11:48 PM
#214
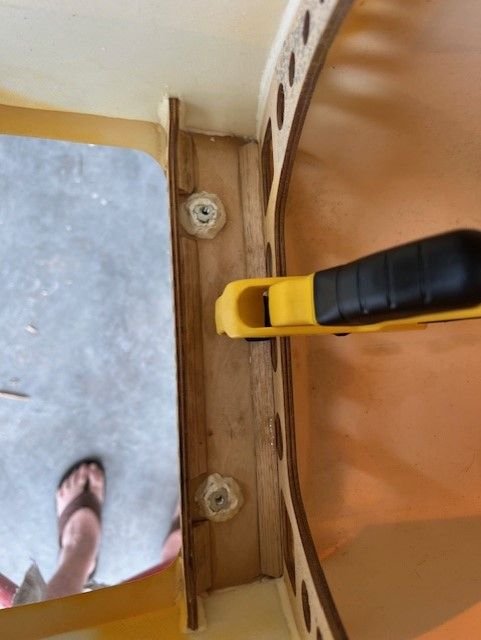
Cowl brackets are glued in with hysol. Couple of screws to hole the large one in place while the hysol cures.
Tee nuts will be inserted and held on with epoxy, drill hole through firewall and bolts go from inside the fuselage.
Simples.
Tee nuts will be inserted and held on with epoxy, drill hole through firewall and bolts go from inside the fuselage.
Simples.
01-21-2024, 12:38 PM
#215
As I feared the hysol on the top bracket managed to weep under and onto the top of the cowl recess on the fuz, got it apart ok and a bit of wet and dry 600 done wet to feather the area plus some pink filler soon sorted that.
Wet sanded the filler back and sprayed primer then flat black.
On the rear of the bracket though I had to sand back the hysol and I got too heavy handed and went through the cowl itself in a small line. Put hysol as a filler on the inside and let cure, wet sand the offending area on top and more pink filler. Wasn't quite cured enough to rub back.
Decided to open up the scale exhaust areas each side, these will only be used to exit hot air. The actual cowl flaps I decided to open out quite a way as per full size. Cut those out nicely and smoothed the area.
Working out how to attach them and what to use each side to keep them open.
This should give it adequate exit area.
01-21-2024, 03:57 PM
#216
Member
Using my handy bathroom scales, it took roughly 50lbs of pressure to get the oleos to move. so maybe if you land in a power dive you could get them to move a fraction of a second before the airframe explodes.
I have ordered a selection of springs from Ali Express of varying wire sizes and hopefully I can give you guys a more workable solution that results in actual functioning oleos.
I initially ordered 12mm dia. springs, but those turned out to be a fraction of a mm too large to fit. Expecting a new shipment of 11mm dia. springs any day now.
01-28-2024, 05:52 PM
#220
Member
i don't want to use the stock springs but i can't find any 11mm springs to use. jp hobby only has 10 and 12mm.
got a flight report from a guy in the states flying with a gp-123. said it was a stress free maiden and it flew well. he said he cut the stock springs but it's still too stiff.
he said he developed a crack in the gear mounts. used stock cg and 35mm throws for the elevator and 30mm for the ailerons. he was happy with them.
02-02-2024, 03:15 PM
#223
Pilots ordered and currently working out light options. Looking to put 40mm fold down landing lights in outer wing panels which should be doable.
Is it fully scale and do I care? No. If others get their knickers in a knot about it then sad.
My plane and will do it my way.
Is it fully scale and do I care? No. If others get their knickers in a knot about it then sad.
My plane and will do it my way.
The following users liked this post:
MikeJM (02-07-2024)
02-04-2024, 05:16 PM
#224

My Feedback: (6)
i don't want to use the stock springs but i can't find any 11mm springs to use. jp hobby only has 10 and 12mm.
got a flight report from a guy in the states flying with a gp-123. said it was a stress free maiden and it flew well. he said he cut the stock springs but it's still too stiff.
he said he developed a crack in the gear mounts. used stock cg and 35mm throws for the elevator and 30mm for the ailerons. he was happy with them.
got a flight report from a guy in the states flying with a gp-123. said it was a stress free maiden and it flew well. he said he cut the stock springs but it's still too stiff.
he said he developed a crack in the gear mounts. used stock cg and 35mm throws for the elevator and 30mm for the ailerons. he was happy with them.